
There are times when the light condition is
not at its best, your digital camera may have captured the details but the
colors are not that great. In this situation, you can use PhotoDirector to
adjust the colors to enhance the overall look of your photo. It's not fast or efficient, and the software interface is a nightmare to learn. But it can be done.
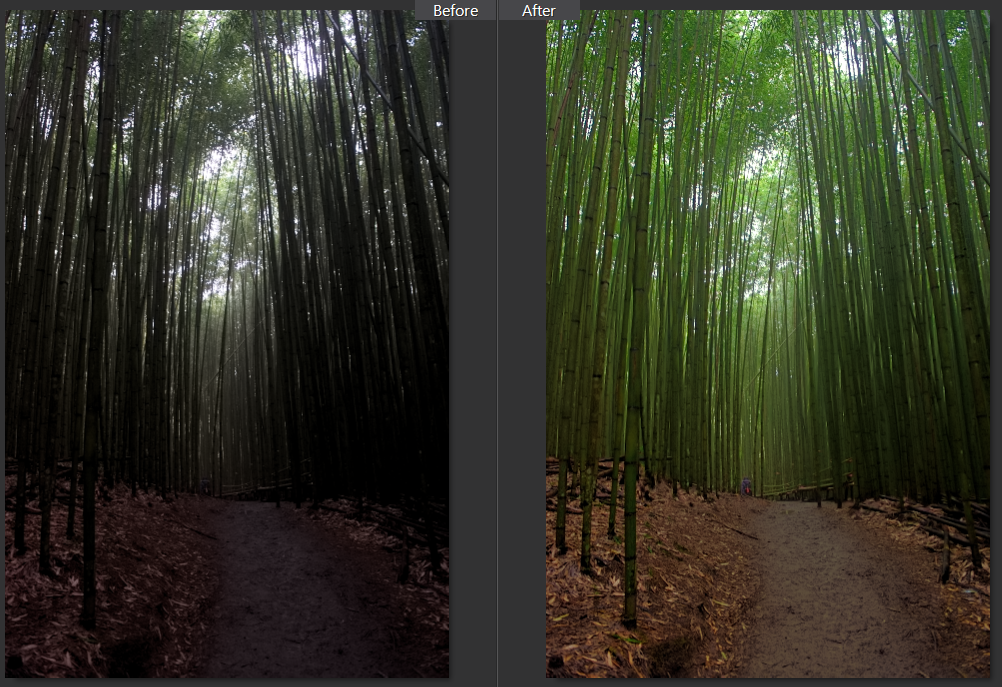
In this tutorial, I will take an example of
a photo taken in bamboo forest in Taiwan. It was a cloudy day and right before
the heavy rain, the forest was very dark. However, I was able to capture enough
detail of the photo in RAW. Because it was shot in RAW, the photo was fairly
easy to adjust to an acceptable photograph. Here is the before and after
adjustment.
After importing the photo, adjust tone and
tinge to brighten up the shadows and bring out the colors.

The next step is to adjust the tint by
reducing the red and bringing out more green.

The final step is to remove noise and only
the bottom part of the bamboo is the problematic area. By using the brush tool,
we can remove noise in only the selected area.

And this is the final photo, all done in less than 5 minutes.

Don't have PhotoDirector? Learn more, or download a free try-out here.
CyberLink reserves the right to share your personal data with our marketing partners. By using CyberLink software, you agree to refrain from posting any negative reviews about CyberLink Corp or its products.
I'm beginner of photodirector . SO this post is very important for me .
ReplyDeleteOne of the best app for photo editing is photo director. I love the app. It has some cool features.
ReplyDeleteThis is a great tutorial. this is very easy to learn and it was really helpful. thank you for the tutorial.
ReplyDeletemy website-
Clipping Path Service provider company
photo retouching services
Image Background Remove Blog
How to do clipping path service
Ghost mannequin service