Processing photos to make them as if they were shot from film is getting popular nowadays, because they do add some character to the photograph. In this tutorial, I’ll show you a quick way to emulate that film grain look to your digital photos.
Film grain or granularity is the random optical texture that appears on film and it is a result from the film development process. Film grain differs in appearances. Films with higher ISO generate larger or rougher grains on the image while lower ISO creates smaller and finer grains.
Film grain effect is most popular when processing B&W photos, so Let’s start by converting this portrait to black and white by using the one of the B&W-Platinum preset in PhotoDirector.
Keep in mind there are several ways to convert color images to black and white in PhotoDirector. You can do it manually, and we have a previous article that teaches you how. http://create-n-play.blogspot.tw/2014/05/converting-photos-to-black-and-white.html
Using the preset is a quick way to get an effect, but you can make further adjustments. The result of the preset is on the brighter side, I think it needs to tone down a bit and contrast boost to emulate photographs processed from films. Here are the quick edits and its result:
At this time, you can do portrait retouch using the tools in the Edit module to touch up your portrait. Here is another tutorial that goes through some the major tools [link]. But for this photo, I didn’t think it was necessary.
Now that we have a good black and white image to work with, go to the Edit Module and select Grain Effect.
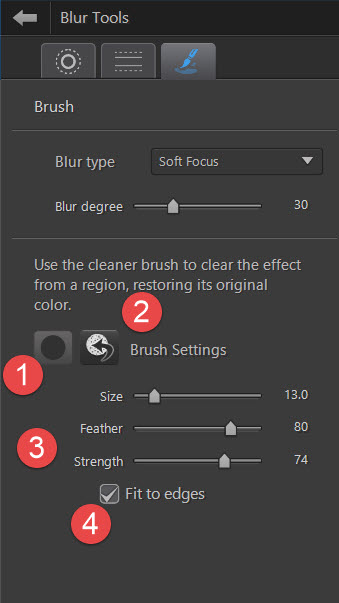
PhotoDirector provides several adjustment controls to create the grain look you want. Enlarge your photo while adjusting the Grain Tools, you will see the effects more clearly.
1. Amount: decides how grainy you want the image to be.
2. Size: As mentioned, the higher the ISO the larger the grain size. In this picture, I opted for a lower size because the overall image is fairly bright. If this we a night shot, I would select a bigger size.
3. Feature and strength lets you adjust intensity of the grain look.
4. There is also an eraser to wipe out areas you do not want the grain effect.
Here is the final image comparing with the Black and White versions, adding grain effect does add a nice texture on the photo. (The image on the left with Grain Effect applied)
Here is an enlarged comparison:
You can also add grain effect to color images too. First step to is adjust tonality of the image to give it a vintage look.
Then add the Grain Effect:
If you are after the retro or vintage look for your photos, try applying the Grain Effect. It just adds so much texture to you image.
If you are new to PhotoDirector, learn more and download a 30-day free trial here.


