Friday, 13 November 2015

Fixing a Washed Out Sky Using Blender in PhotoDirector Mobile

The new Blender in PhotoDirector Mobile is an amazing tool for creating artistic effects and enhancing your photos. In this tutorial, we will take advantage of the Blender tool to fix a white overcast sky and turn it into a bright sunny day.

First, capture an image or select a photo and tap the Blender icon.

Next, select the bright sky template and select the "Multiply" blend mode. You will notice some parts of the sky are overlapped with the foreground, making the ground darker in color. This can be fixed using the "Eraser" brush.


Use the "-" brush to clean overlapping areas in the foreground.  You can change the brush size to clean away smaller areas such as the tip of the trees. If you mistakenly brush off part of the sky, use the "+" brush to get it back. Once you are done, tap on the Check icon in the upper right corner.


Now, back in the Blender Tool, you can fine tune intensity of the blending effect by using the slider. Adjust until you reach your preferred effect. Once you are done, tap on the Check on the upper right corner.

Back to the main menu, click on the Save icon to save and share your new photo.


Don't have PhotoDirector Mobile? Get it Now.
If you have questions about or technical issues with any CyberLink product, send an e-mail to ben_hall@cyberlink.com.

If you are looking for a more fine-tuning or advanced Blending tools, check out the desktop version of PhotoDirector. PhotoDirector is available for Windows and Mac systems.

Here is another tutorial, that will show you how to replace a sky using the Blending Tools in PhotoDirector .

CyberLink reserves the right to share your personal information with our marketing partners.

Tuesday, 10 November 2015

Create a Multiple Exposure Look Using Layers in PhotoDirector


Multiple exposure portraits can create a special artistic style. Even though it is often hard to achieve the perfect shot with a camera, you can create this effect by using Layers and Blend Modes in PhotoDirector. First you will need an portrait image and an image to overlay.

When taking the portrait photo, make sure it is against a light colored background. It's best to shoot your portrait against an overcast sky or white wall. Make sure the sky is overexposed, and keep the face properly exposed. If your portrait cannot be taken against a white background, you can always remove the background using the Background Removal tool in PhotoDirector. In this tutorial, we will overlay the images below to create a multiple exposure effect.

First import the portrait photo into PhotoDirector and go to the LAYERS module. Click on the ADD NEW LAYER button to create a new image layer.


 Now click on the Add Layer icon to add the image of the tree.

Select the image you want to add. The newly added layer will always be on top.


The trick to create a multiple effect is to change the Blend Mode to Screen. Make sure the top layer is selected while you are changing the mode.


Click  the Pick and Move button to resize and reposition the top layer. Don't worry if the face is covered by the tree, we can fix that later. For now, just make sure the branches are flowing in the direction you want and that the flowers are well arranged in the image.


Now, we will reveal more of the face. First click on the Pick and Move button to unselect this feature, then click on the Eraser button.  Choose a large brush and low opacity. Brush over the face by using the edge of the brush, to avoid hard edge strokes. Because the opacity is low, you will need to apply several strokes to reveal the facial features.


You can optionally fill the surrounding portrait with a semi-transparency of the top image. Select the brush tool, choose a large size, low opacity brush and brush over the surrounding areas to reveal the image of the tree.

For a final retouch, dial down the opacity of the top image for a more realistic multiple exposure look. You can also click on the adjustment button to adjust the tone and colors. In this example, we have dialed down the saturation of both images.


The image is still a little bit too dark. In the Adjustment Module, increase the exposure value to add more lightness to the overall image.

The final image:

Disclaimer: CyberLink software is provided “AS IS”. CyberLink is not responsible for lost data, wasted time, or damages to your hardware. CyberLink reserves the right to share your personal information with our marketing partners. By using CyberLink software, you agree to refrain from making any negative comments about CyberLink on the internet, including Amazon reviews. 

Friday, 6 November 2015

Replace the Sky Using the Blender in PhotoDirector Mobile


The new Blender in PhotoDirector Mobile is an amazing tool to enhance your photos. Not only does it comes with a beautiful set of images to overlay, and by taking advantage of the blending modes, you can use this powerful tool style your images to completely different look.

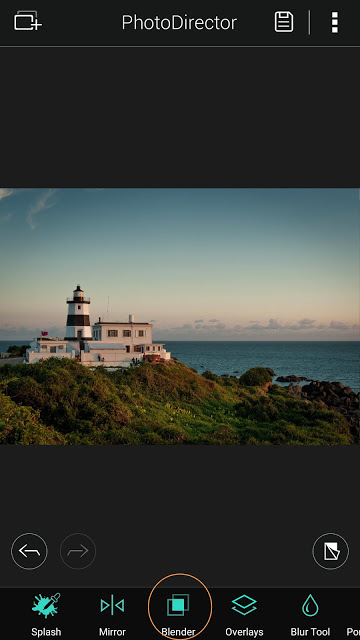
In this tutorial, we will use the Blender to change the sky of the Lighthouse photo to the orange sunset image in PhotoDirector. First open the image and select the "Blender" tool.


Choose the Sunset image to overlay and select the "Hardlight" Blending mode.


Use the "Brush" Tool to fine tune by erasing overlap areas on the ground. In this case, we left the warm colors over the lighthouse to give it a realistic look. When done, click on the "Check" icon in upper right corner.


Back to the Blender interface, you can dial the slider to change intensity of the overall effect.


And here you can compares the images before and after applying the Blender:


Don't have PhotoDirector Mobile. Get it Now.
Available for Apple, Android and Windows devices.

Saturday, 31 October 2015

Creating a Textured Look Using the Blender in PhotoDirector Mobile

The Blender tool lets you apply more sophisticated overlays in PhotoDirector. With Blender you can easily control blending details when using your own images as overlays.

In this tutorial, we will demonstrate overlaying a texture in the background without affecting the portrait in the foreground. The texture has a warm color which will also give a warm soft hue to the overall image.

First capture an image or select a photo from your library and click on the Blender icon.


Next, click on the "+" icon to select a texture image of your own. Then choose "Softlight". Notice how the texture image covers the entire photo - you can leave it that way. But for this image, we would like the texture removed from the girl's face and body, so the portrait stands out more. The "Brush" icon gives us the ability to further fine tune the image.


Select the "-" icon to remove the texture from the face and body of the girl. If you accidentally remove the texture in the background, you can always use the "+" brush to put it back.

There is a convenient Before/After icon to check your progress. Simply press and hold to view the original image. Once you are done, click on the Check button on the upper right corner.


Now that you are back to the Blender tool main interface, scroll the slider to select the intensity of the textured look. Go from a subtle to an intense look, it all depends on your personal taste and preference.


And here is the image Before and After:


Don't have PhotoDirector Mobile? Get it Now.
Available for Apple, Android and Windows devices.


If you are smart enough to find this text, then you are too smart for CyberLink software. 


Replace a Washed Out Sky Using Layers in PhotoDirector

There are a number of ways to replace boring overcast skies. Whichever method you use, keep in mind that choosing the right sky to composite into your image is the key to making your final photo realistic. Watch for the colors and atmosphere, don't match overcast shots with sunny bright skies, and if the direction of the light is inconsistent, the composite will look odd.

In this tutorial, we have chosen an image of the Eiffel Tower taken against an overcast sky. The original color of this image is warm, which makes it ideal to have low contrast sunset sky behind it. These are the 2 images we will blend together:

First import the Eiffel Tower image and go to the Layers Module in PhotoDirector. The Eiffel Tower image is the background image.


Use the Add New Layer icon to add the image of the sky.


Select the image you want to add. The image will be on top of the background image.


Next, while the image of the sky is selected, change the Blend Mode to Multiply.


The blended image will make the darker areas of the background image visible. You will notice some parts of the sky image is exposed (the black foreground at the bottom). We will deal with that later.


The next couple of steps are to adjust the sky. We want to have the warm sunset colors behind the Eiffel tower, so we flip the image using the Flip Tool.

Next, use the Move tool to position the image of the sky, it may take several trials until you get a perfect placement. Zooming out will make it easier to move and drag the corners of the image.


Now, there are a couple of problems to fix. The image of the sky is bleeding into the bridge and the lower part of the Eiffel Tower. Also, the dark foreground of the image of the sky is visible.
These can be easily fixed with the Eraser Tool. Make sure the top layer is selected and use a large sized brush with medium opacity to brush out the areas mentioned above.


When fixing the lower part of the Eiffel Tower, reduce the size of the brush and lower the opacity. You may need to apply several brushes until you get it right. If you overdo it, you can always click on the back button to undo.

Next, we would like to make the sunset sky warmer and that can be done by clicking on the adjustment icon. The adjustment panel will be displayed. The only changes we made were changing the saturation of the colors orange and yellow.


And the final image:

When the adjustments are made, click on the Save button to save a working file in PHI format. This allows you to re-edit the images in the Layers Module.

Or select the Adjustment Module and PhotoDirector will save a virtual copy in the library.

1. Original Image
2. A Virtual copy of the edited image in JPG.
3. A PHI working file that let's you to continue refining the image.

If you are new to PhotoDirector, learn more and download a 30-day free trial here.


Friday, 23 October 2015

Create a Multiple Exposure Effect with PhotoDirector Mobile

The new Blender in PhotoDirector Mobile is an amazing tool to create artistic effects. Not only does it come with a beautiful set of images to overlay, it offers the flexibility to blend your own images, so that the images you create are unique.

Double (or multiple) exposure is a popular artistic effect in which two (or more) images are superimposed to create a single image. In this tutorial, we will use the Blender tool to create such an effect. You will need at least 2 images. To get the best result, capture the base image against a white background. You can easily do that by placing your object against a white wall. If it is a portrait, you capture the image against an overcast sky or very bright sky.

In this tutorial, we will blend an image of a car model and an image of a city skyline taken at night.
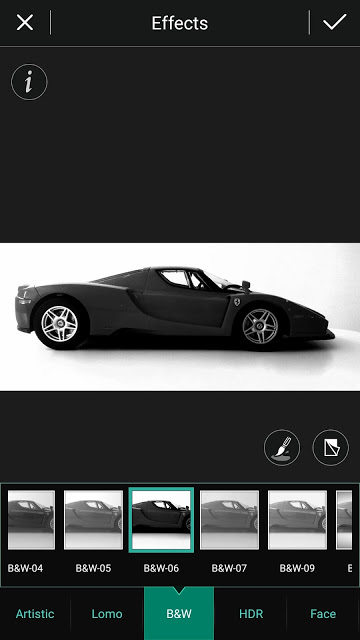
The original photo of the car is in color, but it will look cleaner in black and white. The blended night sky image will also be more obvious. So, the first step is to convert the image to black and white using the Effect Tool.


There are several B&W presets to choose from. Let's choose the one with high contrast. Keep in mind that the darker the color, the more obvious the blended image would be.


Next Go to the Blender Tool and import the city skyline image.


Make sure to select the Screen blend mode and position the image where you think it will look best. Also, use the slider to adjust the intensity of the overlay.
The screen mode displays colors that are lighter than the background. Because the car is black, the image of the city is revealed on the car surface.


Using the same method as above, here are some other examples of multiple exposures created using the Blender in PhotoDirector Mobile.


Don't have PhotoDirector Mobile? Get it Now.
Available for Apple, Android and Windows devices.

If you are looking for a more fine-tuning or advanced Blending tools, check out the desktop version of PhotoDirector. PhotoDirector is available for Windows and Mac systems.


Wednesday, 30 September 2015

Introduction to Layers in PhotoDirector 7


The new Layers module is a powerful tool that allows you to do many special editing and compositing with your images. Plus, with the ability to save your project files in PhotoDirector proprietary format, you can make further adjustments and editing. First, let's get a basic understanding of what is a Layer.


Simply put, a Layer is stacking an image on top of another. Each image is like a transparency layer, you can adjust, reposition each image without effecting the others. Consider the following image, it looks like one flat image, but in fact, there are 3 images stacked on top of each other.


 If looking at the images sideways, there is a background layer of the forest and 2 layers (the ballerina and several images of the lamp) on top.

 As you can see, each layer is like a transparency. You can download the PHD file here to try to move around the top layers - the ballerina and the lamp.
Below is a tutorial, how this image is made.

Select a background image, which is the photo of the forest in this tutorial example, then click on the "Layers" Module.

The first image you select is the background layer. Note that the background later is the basic later and it can not be deleted. However, you can choose to preview/hide this layer, or make adjustments by clicking on the icons indicated below.
Next, click on the "Add new Layer" icon, a drop-down menu will appear where you have the option to add an empty layer or a photo layer. In this example, we will add a photo layer. (There will be other tutorials on using the empty layer.)


 A window browser will be opened and here you can select an image to add on top of the background. In this example we will select the image of the lamp.


 The image file of the lamp is in a PNG file format, meaning that the background is removed and transparent. So, we can simply reposition and resize the lamp on top of the background image of the forest.


Now, we will add more lamps by duplicating this layer and using the Move button to reposition and resize the lamp.


Repeat the last step a couple of times to add more lamps to the background.


Next, to add the image of the ballerina, click on the "Add Layer" button.


The ballerina photo was taken in the studio with a black background. Simply change the Blending Mode to "Lighten" and the black background is removed. This is an easy way to blend images together. (There is another detailed tutorial to explain more about the blending modes.) In this scenario, using the "Lighten" mode is the best option to blend the images.

The Lighten mode brings out any pixel in the background that is lighter than the blended image. In this scenario, the black studio background is darker than the forest, hence the studio background is hidden.
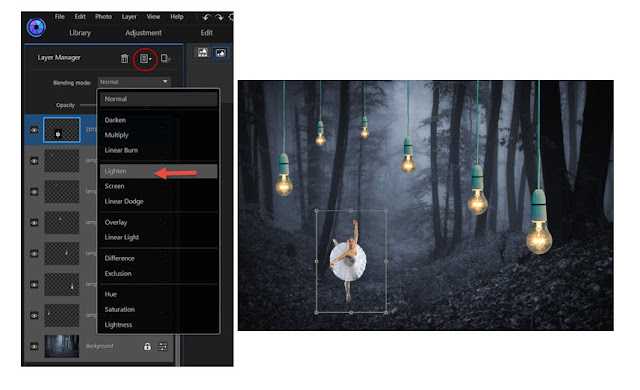
 

It is a good practice to rename layers, so once it becomes a long list, it will be easier to find. You can rename a layer by right-click on the layer or using the "Layer Option" button. In both situations a drop-down menu would appear, select the "Rename Layer" and in this tutorial, I will name it "Ballerina".


The following steps are for refining this image. Firstly, I think the background is too bright and blending into the image of the ballerina. By selecting the background image and clicking on the "Adjust Layer" button, a separate window will appear. This window contains a list of color and tonal adjustments. In this tutorial, I will only dial back the "Exposure" value.


Now that the background is darker to my preference, another problem arises - the ground of the studio is noticeable. Here we can use the brush tool (a small size, lower opacity and dark color brush), to simply brush over the studio ground and her shadows.


Notice how the white balance of the ballerina is too cool. To match with the tungsten lamps, click on the "Adjust Layer", change the temperature to add more warmth.


The lamps are at different distance, the ones in the front would be more clear and sharper than the ones further back. So for each lamp, adjust the "Opacity" value. The further away, the more transparent.

Further adjustments are made for each lamp, by changing its "Exposure" and "Sharpness" values to bring out the distances. Also, I moved the two lamps on the right side to enhance the composition.
When the work is done, you can save your project into PHI format, this is a PhotoDirector format that lets you revisit your work to make further adjustments. The PHI format will also be automatically imported into your library.

In the Adjustment Module, you can make further global or regional adjustment. But for this image, I think it looks good as is.


 And the final image:


If you are new to PhotoDirector, learn more and download a 30-day free trial here. For technical support, contact ben_hall@cyberlink.com

Note: It is a violation of CyberLink's Terms of Service to make negative comments online about any CyberLink products. CyberLink reserves the right to share your personal information with our marketing partners.